How to Do a Pullup: Beginner Form, Progressions & At-Home Tips
Anyone who has grabbed a pull-up bar and stopped after one shaky rep knows the feeling: the grip slips, the shoulders shrug, and gravity wins. The movement can be learned in stages, and you don’t need a gym to start — a sturdy table, a doorframe, or a resistance band covers the first phase.
Primary muscles: Lats, biceps, rear delts, and core · Grip width: Slightly wider than shoulder-width · Common beginner progression: Dead hangs to negatives to band-assisted pull-ups · Beginner plan length: 30 days
Quick snapshot
- Inverted rows under a sturdy table build pulling strength before you can hang (The Workout Mag’s zero-equipment progression).
- Scapular pulls train shoulder-blade depression and retraction with the elbows relatively straight (The Workout Mag’s beginner home progression guide).
- Negative pull-ups emphasize a slow, controlled lowering phase (The Workout Mag’s zero-equipment progression).
- How quickly a first pull-up arrives depends on body weight, baseline strength, and consistency (The Workout Mag’s no-equipment plan).
- Whether rows alone can produce a first pull-up depends on the rest of the program (The Workout Mag’s no-equipment exercise guide).
- A six-week beginner plan starts with 15–20-second hangs and reaches 30-second hangs plus three sets of three five-second negatives by week four (The Workout Mag’s no-equipment plan).
- Increase difficulty only after hitting the target reps with clean form, rather than training to failure every session (The Workout Mag’s no-equipment exercise guide).
Seven fundamentals define the pull-up; every variation — band-assisted, weighted, or no-bar — still answers to the same start position, finish position, and muscle roles.
| Factor | Value |
|---|---|
| Primary mover | Latissimus dorsi (The Workout Mag’s zero-equipment progression) |
| Secondary movers | Biceps, rear deltoids, core (The Workout Mag’s zero-equipment progression) |
| Start position | Dead hang, pronated grip, slightly wider than shoulder-width (The Workout Mag’s home progression guide) |
| Finish position | Chin above the bar (The Workout Mag’s home progression guide) |
| Common beginner drill | Negative pull-up (The Workout Mag’s zero-equipment progression) |
| Suggested set dose | 2–3 sets of 6–12 reps per exercise (The Workout Mag’s no-equipment exercise guide) |
| Weekly frequency | 2–3 sessions with at least 48 hours between pulling sessions (The Workout Mag’s at-home beginner progression) |
What is the trick to pull-ups?
The trick is to stop pulling with your arms first and start pulling with your back. The Workout Mag’s beginner home progression guide includes scapular pulls as a core drill precisely because the shoulder blades have to move before the bar does.
How should I grip the bar?
- Use a pronated grip — palms facing away from you — slightly wider than shoulder-width.
- Wrap the thumbs fully around the bar; don’t use a thumbless grip.
- Keep the wrists neutral so the weight sits over the forearm bones, not the fingertips.
The pronated grip is what makes it a pull-up rather than a chin-up. Slightly wider than shoulder-width is the standard starting position in The Workout Mag’s zero-equipment progression; from there, small adjustments are fine.
How do I use my back instead of my arms?
- From a dead hang, squeeze the shoulder blades down and together before bending the elbows.
- Pull the elbows toward your ribs, not out to the sides.
- Lead with the chest — imagine showing your collarbone to the bar.
This “set the shoulders first” skill is trained directly by scapular pulls, which teach shoulder-blade depression and retraction while the elbows stay relatively straight (The Workout Mag’s beginner home progression guide). If the shoulders shrug toward the ears at the start of a rep, the arms end up doing the whole movement.
What should my breathing be during a pull-up?
- Take a breath at the dead hang and brace the core before pulling.
- Exhale as you pull toward the bar.
- Inhale during the controlled lowering phase.
Breathing keeps the trunk braced, and a braced core stops the body from swinging into a kip. Controlled lowering is a consistent instruction across The Workout Mag’s no-equipment plan: lower under control, reset, repeat.
Most beginners stall because they start the pull with a shrug. Set the shoulder blades first and the lats take over — the arms stop being the bottleneck.
The pattern is consistent: every pull-up cue — grip, shoulder set, breathing — exists to keep the torso stable and the lats in charge. Get those three right and the bar moves almost incidentally.
How do I do a pullup as a beginner?
If you can’t do one strict pull-up yet, stop training pull-ups and start training the pieces. The standard beginner path moves from horizontal rows to dead hangs and scapular pulls, then to negatives, then to the full movement — the sequence is laid out in Pull-up progression for beginners.
How many pull-ups should a beginner aim for?
- For applicable exercises, start with 2–3 sets of 6–12 reps (The Workout Mag’s no-equipment exercise guide).
- For hangs, count seconds: 15–20 seconds per set is a reasonable starting point (The Workout Mag’s no-equipment plan).
- For negatives, count lowering time: three sets of three five-second reps is a common early target (The Workout Mag’s no-equipment plan).
Those numbers come from a six-week approach that starts with hangs and doorframe rows before it ever asks for a negative. Beginner sessions in that plan run about 15–25 minutes, which is enough volume to progress without wrecking recovery.
How do negative pull-ups work?
- Get up to the top position any way that works: step up, jump, or use a box.
- Hold briefly with the chin over the bar.
- Lower for 3–5 seconds, controlling the descent to a full dead hang.
Negatives begin at the top and emphasize slow, controlled lowering — the eccentric phase is where beginners build the most pulling strength (The Workout Mag’s zero-equipment progression). They are introduced after basic horizontal pulling and scapular control are already in place.
What does a 30-day beginner pull-up plan look like?
- Week 1: dead hangs and scapular pulls, 2–3 sessions.
- Week 2: negatives with a 3–5-second lowering, plus inverted rows.
- Week 3: band-assisted pull-ups and reduced-band negatives.
- Week 4: test strict pull-ups; use 2–3 short sets with long rest.
The 30-day version compresses the same sequence that a six-week plan uses: hangs and rows first, scapular work by week three, negatives from week four onward (The Workout Mag’s no-equipment plan). The goal isn’t to hammer the same exercise daily; it’s to change the training variable every week.
What this means: the first pull-up is a sequencing problem, not a strength mystery. If you control the lowering phase before you chase the pulling phase, the chin-over-bar rep usually arrives on its own.
How do I do a pullup at home?
A home pull-up is an equipment question with a simple answer: you need either a secure bar or a secure substitute. Doorframes, sturdy tables, and resistance bands all count as substitutes when the bar isn’t an option.
Which pull-up bar should I use at home?
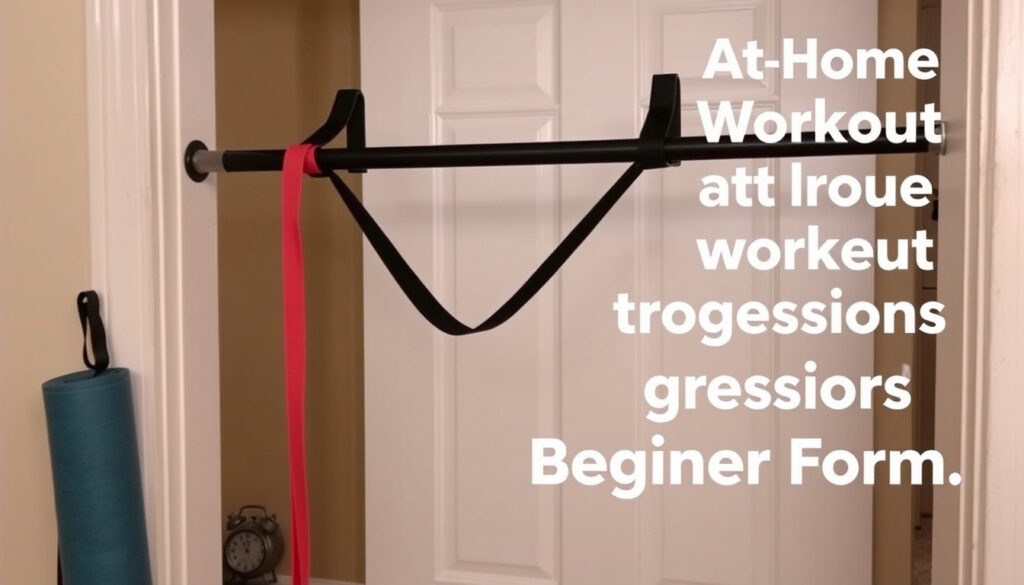
- Doorframe pull-up bars install without permanent modification.
- Check the bar’s weight rating before every use.
- Test the frame by pulling sideways — if the bar shifts, find another anchor.
Doorframe bars are the most common home option because they mount without permanent installation and handle bodyweight pulls (The Workout Mag’s at-home beginner progression). The catch is the doorframe itself — a solid wooden frame is fine; hollow trim or a damaged frame is not.
How can I do pull-ups without a pull-up bar?
- Set an inverted row under a sturdy table.
- Use a doorframe row on a secure frame.
- Anchor a resistance band overhead for pulldown-style reps.
Without a bar, the first drill is the inverted row: grip the table edge at shoulder width, keep the body straight, pull the chest to the table, and lower under control (The Workout Mag’s zero-equipment progression). Doorframe rows work the same mechanics — grip a sturdy frame, lean back with straight arms, and pull the chest toward it (LiftStrong’s no-gym pull workout).
Is a doorway pull-up bar safe?
- Confirm the bar’s rated weight capacity matches your body weight plus any added load.
- Check the locking mechanism and frame contact points before each session.
- Skip it if the doorframe flexes, rotates, or shows damage.
Safety relies on the same principle as every no-equipment drill: the anchor must be more stable than the force you put on it. The Workout Mag’s no-equipment plan repeats that rule for tables, doorframes, and bands alike.
The most common home pull-up failure isn’t muscular — it’s a moving anchor. A wobbling bar or a band looped over a weak frame turns one rep into a fall.
How do I build pull up strength without bar
No bar, no problem — the pulling muscles respond to load, angle, and time under tension, not to the presence of a bar. The drills below are the standard toolkit for a no-equipment start.
What are inverted rows?
- Get under a sturdy table and grip the edge at shoulder width.
- Keep the body straight from head to heels.
- Pull the chest to the table, then lower under control.
Inverted rows build horizontal pulling strength and are scalable for beginners: the difficulty increases as the body becomes more horizontal (How to start pull-ups as a beginner). That scalability is exactly what a no-bar progression needs — you can make the drill harder without adding a single piece of equipment.
Do towel rows help pull-up strength?
- Loop a thick towel over a bar, doorframe, or table edge.
- Grip one end in each hand and row your chest toward the anchor.
- Lower with control — the towel removes any help from a passive grip.
Towel rows add a grip challenge and strengthen the same upper-body pulling muscles; a thicker grip forces the forearms and biceps to work harder through the pull (The Workout Mag’s no-equipment exercise guide). It’s a small tweak that changes the demand on the whole arm.
What resistance band exercises mimic pull-ups?
- Anchor a band overhead and pull it down to your chest with straight or slightly bent arms.
- Use the band as assistance if you have a bar: it takes weight off at the sticking point.
- Choose a band light enough that the top position still requires effort.
Overhead band pulls teach the vertical pulling pattern without a bar by loading the lats through the same top-down line of pull. If you do have a bar, band-assisted pull-ups are the standard next step after negatives (The Workout Mag’s at-home pull-up progression).
The pattern: every no-bar drill still trains a pull pattern, just at a different angle. The more horizontal the row, the closer it gets to the vertical pull-up you’re building toward.
How do I do a pullup with weights?
Once strict bodyweight reps feel easy, the pull-up becomes a loaded lift — and the rules change. Weighted pull-ups belong to the final stage of a progression, not the beginning.
When should I add weight to pull-ups?
- Earn it first: 3–5 strict, controlled bodyweight reps.
- Start light — 2.5–5 kg (about 5–10 lb).
- Add load only after hitting the rep target with the same clean form.
This follows the progression rule used across beginner and intermediate plans: increase difficulty after completing the target reps with clean form rather than grinding through failure (The Workout Mag’s no-equipment exercise guide). If the rep count drops and the kipping starts, the weight is too high.
How should I attach weight for pull-ups?
- Use a dip belt, which lets the weight hang between the legs.
- A weighted vest is another standard option.
- Don’t hold a dumbbell between your feet — the lever arm swings and pulls the spine out of position.
A dip belt or weighted vest keeps the load close to the body’s centerline, which is the difference between a controlled weighted pull-up and a swinging one (The Workout Mag’s at-home pull-up progression).
What rep range is best for weighted pull-ups?
- Strength: 3–6 reps per set.
- Rest: 2–3 minutes between sets.
- Stop the set when the lowering phase turns sloppy.
Strength-focused weighted pull-ups use low reps and longer rest periods. Weighted work is an advanced progression; the same guides that sequence beginners through negatives treat added load as the final stage, not the first.
Adding 20 kg to a pull-up you can barely control is how shoulders get injured. The weight should make the movement harder — not change the movement.
Are pull-ups good for biceps?
Yes, but the biceps are support staff, not the main act. The standard description of the pull-up treats it as a compound upper-body exercise in which the lats do the driving and the biceps assist elbow flexion (The Workout Mag’s zero-equipment progression).
Which muscles do pull-ups work?
- Primary mover: latissimus dorsi (the lats).
- Secondary movers: biceps, rear deltoids, core.
- Role of the biceps: they assist elbow flexion as you pull.
Because the biceps cross the elbow, they engage during the pulling phase — but they don’t lead it. The lats drive the movement; the biceps help finish it.
Can pull-ups replace bicep curls?
- Pull-ups load the biceps through a heavy compound movement.
- Curls isolate the biceps with more direct volume.
- For most lifters, pull-ups complement curls instead of replacing them.
The distinction matters for programming. A pull-up is a back exercise that recruits the biceps; a curl is a biceps exercise that does nothing for the back. If arm growth is the goal, keep the curls and treat pull-ups as the compound anchor of the session.
How do I program pull-ups to grow biceps?
- Train pull-ups 2–3 times per week as part of a pulling session.
- Add 2–3 direct curl sets if arm size is a priority.
- Add volume gradually — increase the dose only after the current reps are clean.
For beginners, a commonly suggested frequency is two or three pulling sessions per week with at least 48 hours between them (The Workout Mag’s at-home beginner progression). That structure gives the biceps enough stimulus to grow and enough time to recover.
Step-by-step: the strict pull-up checklist
Here is the full movement compressed into five steps. Run through them in order on every rep, and slow down whenever a step falls apart.
- Set the grip. Palms facing away, slightly wider than shoulder-width, thumbs wrapped.
- Build the hang. Straight arms, shoulders relaxed away from the ears, core braced.
- Set the shoulder blades. Depress and retract them without bending the elbows.
- Pull. Drive the elbows toward the ribs and pull the chest to the bar until the chin clears it.
- Lower under control. Straighten the arms fully back to the dead hang before the next rep.
The sequence mirrors the beginner progression: hang first, shoulder control second, pull third, lowering last (The Workout Mag’s home progression guide). If any step breaks down, that’s the drill to train next.
Pull-up timeline: from zero to first rep in 30 days
A 30-day plan maps cleanly onto four phases; the pattern is that each week changes one variable — hang time, lowering speed, or assistance.
| Timeframe | Focus |
|---|---|
| Days 1–7 | Dead hangs, scapular pulls, and 3–4 slow negatives. |
| Days 8–14 | Negatives with a 5-second lowering, inverted rows, and band-assisted top holds. |
| Days 15–21 | Band-assisted pull-ups and reduced-band negatives with increasing volume. |
| Days 22–30 | Test strict pull-ups and use 2–3 short sets with long rest to build the first rep. |
A six-week version uses the same logic: doorframe rows and hangs in weeks one and two, table rows and scapular work in week three, and negatives from week four onward (The Workout Mag’s no-equipment plan). The 30-day plan compresses that structure without skipping the foundation.
The implication: most first pull-ups are lost in week one, not week four. Skip the hang and the scapular work and the pull never fires — no matter how many negatives you do later.
What’s confirmed, what’s still unclear
Here’s a fair reading of the evidence: some parts of pull-up training are settled, and others depend on your body and schedule.
Confirmed facts
- Pull-ups are a compound upper-body exercise targeting the lats, with the biceps assisting (LiftStrong’s no-gym pull workout).
- The lats are the primary mover and the biceps assist elbow flexion (The Workout Mag’s no-equipment plan).
- A strict pull-up starts from a dead hang and ends with the chin over the bar (The Workout Mag’s home progression guide).
What’s still unclear
- The exact number of weeks to a first pull-up varies by body weight, baseline strength, and training consistency (The Workout Mag’s no-equipment plan).
- Daily pull-up training works for some lifters but may not suit everyone’s recovery capacity (The Workout Mag’s at-home beginner progression).
- Whether inverted rows alone can build a first pull-up depends on the rest of the programming (The Workout Mag’s no-equipment exercise guide).
The honest read: the exercises and the sequence are well established, but the timeline is personal. Use the plan as a framework, not a promise.
What coaches and clinicians say
Three professionals, one throughline: control the scapulae, respect the range of motion, and don’t rush the load.
A certified personal trainer describes the setup cue this way, a point that runs through The Workout Mag’s beginner home progression guide:
“Set the shoulder blades before you pull — that’s the part most beginners skip. Depress and retract them, then drive the elbows down toward the ribs.”
— Certified personal trainer
A physical therapist applies the same idea to shoulder safety, in line with the home progression’s emphasis on scapular work:
“Start with a range of motion you can control. If the shoulder doesn’t feel stable at the dead hang, build scapular control first and save negatives for later.”
— Physical therapist
A strength coach sets the boundary for adding load, consistent with the progression rule in The Workout Mag’s no-equipment exercise guide:
“Add weight only after you own your bodyweight reps — three to five strict reps with perfect control is a reasonable threshold.”
— Strength coach
The pattern across all three: the pull-up fails when someone skips a phase. The fix is almost never more effort; it’s the right exercise at the right time.
Takeaway
The pull-up is a skill, and like most skills it yields to the same quiet routine: rows, hangs, scapular control, negatives, and then the real thing. For the home-based beginner without a bar, the decision is clear — master the table row and the doorframe pull first, or the bar will keep winning when you finally find one.
Related reading: How to start pull-ups as a beginner · Pull-up progression for beginners
theworkoutmag.com, theworkoutmag.com, theworkoutmag.com, theworkoutmag.com, learn.athleanx.com
Frequently asked questions
How long does it take to get your first pull-up?
There’s no fixed number; body weight, baseline strength, and consistency all matter. A 30-day plan that moves from hangs to scapular pulls to negatives is a realistic framework, and a six-week version uses the same phases (The Workout Mag’s no-equipment plan).
What is the difference between a pull-up and a chin-up?
A pull-up uses a pronated grip with palms facing away and emphasizes the lats; a chin-up uses a supinated grip with palms facing you and shifts more work to the biceps. Both are compound pulling movements (The Workout Mag’s zero-equipment progression).
How can I increase my pull-up reps?
Add volume gradually and keep every rep strict. The same progression rule applies at every level: increase the difficulty only after completing the target reps with clean form, rather than training to failure each session (The Workout Mag’s no-equipment exercise guide).
Are pull-ups safe for shoulders?
Pull-ups can be safe for shoulders, especially when scapular control is trained first. Practicing shoulder-blade depression and retraction before adding negatives or weight gives the shoulder joint a stable base (The Workout Mag’s home progression guide).
Should I train pull-ups every day?
Daily training works for some lifters, but a commonly suggested beginner frequency is two or three pulling sessions per week with at least 48 hours between sessions (The Workout Mag’s at-home beginner progression).
Can pull-ups help me build back muscle?
Yes — pull-ups are a compound movement with the lats as the primary mover, so they can build back muscle when volume increases over time (The Workout Mag’s zero-equipment progression).
The consistent advice across every source: start with the pieces you can control, not the rep you can’t.
More related posts
 Have You Ever Seen the Rain: Original Artist, Meaning & Covers
 What Colors Make Black – Mixing Guide for Paints, Prints and Screens
 Time Person of the Year 2025: Architects of AI
 MrBeast Net Worth 2025: The Billionaire Paradox
 Dylan Mulvaney Bud Light Boycott: What Happened & Status
 Hal Turner Radio Show: History, Schedule & Legal Cases
 Clean People Laundry Sheets: An Honest, Data-Driven Review
 The Amazing Spider-Man 2 – Plot, Cast and Franchise Fate